【iOS備忘録】 UIAlertController で選択する
iOS8以降でアラートとアクションシートを表示する
iOS7までは UIAlertView や UIActionSheet を使っていましたが、これはiOS8からは非推奨になったようなので、推奨されている UIAlertController の使い方をメモ。
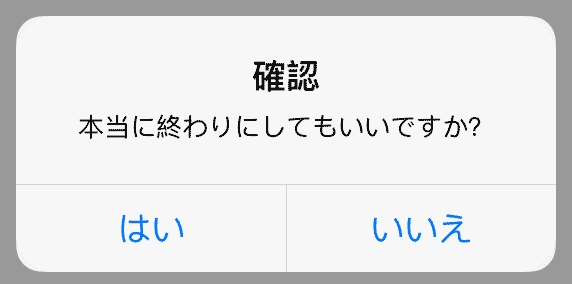
アラートでYes/Noを選択する
- (IBAction)alertBtnEnter:(id)sender {
//アラートコントローラーのインスタンスを生成
UIAlertController *alertController = [UIAlertController alertControllerWithTitle:@"確認" message:@"本当に終わりにしてもいいですか?" preferredStyle:UIAlertControllerStyleAlert];
// 左から順にボタンが配置
[alertController addAction:[UIAlertAction actionWithTitle:@"はい" style:UIAlertActionStyleDefault handler:^(UIAlertAction *action) {
[self otherButtonPushed];
}]];
[alertController addAction:[UIAlertAction actionWithTitle:@"いいえ" style:UIAlertActionStyleDefault handler:^(UIAlertAction *action) {
[self cancelButtonPushed];
}]];
[self presentViewController:alertController animated:YES completion:nil];
}
- (void)cancelButtonPushed {
// cancelボタンが押された時の処理
}
- (void)otherButtonPushed {
// otherボタンが押された時の処理
}

説明
まず、アラートコントローラーのインスタンス(alertController)を生成し、そこにボタンを配置していきます。
addAction で作りますが、左のボタンから順に配置されます。
最後にpresentViewControllerでインスタンス(alertController)を呼び出します。
アクションシートで複数の選択肢から選択する
- (IBAction)actionSheetBtnEnter:(id)sender {
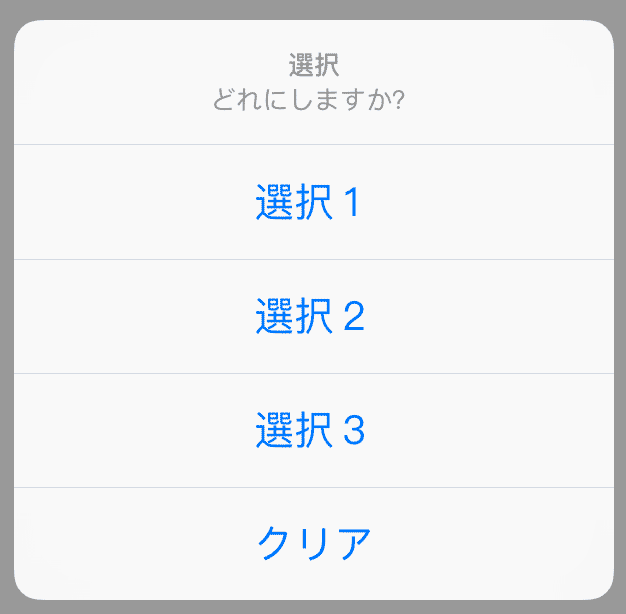
UIAlertController *alertController = [UIAlertController alertControllerWithTitle:@"選択" message:@"どれにしますか?" preferredStyle:UIAlertControllerStyleActionSheet];
// 上から順にボタンが配置
[alertController addAction:[UIAlertAction actionWithTitle:@"選択1" style:UIAlertActionStyleDefault handler:^(UIAlertAction *action) {
[self selectedActionWith:1];
}]];
[alertController addAction:[UIAlertAction actionWithTitle:@"選択2" style:UIAlertActionStyleDefault handler:^(UIAlertAction *action) {
[self selectedActionWith:2];
}]];
[alertController addAction:[UIAlertAction actionWithTitle:@"選択3" style:UIAlertActionStyleDefault handler:^(UIAlertAction *action) {
[self selectedActionWith:3];
}]];
[alertController addAction:[UIAlertAction actionWithTitle:@"クリア" style:UIAlertActionStyleDefault handler:^(UIAlertAction *action) {
[self selectedActionWith:0];
}]];
// iPad用 (これが無いとエラー)
alertController.popoverPresentationController.sourceView = self.view;
alertController.popoverPresentationController.sourceRect = CGRectMake(_actionSheetBtn.frame.origin.x, _actionSheetBtn.frame.origin.y, 20.0, 20.0);
//alertController.popoverPresentationController.sourceView = _actionSheetBtn; //でも良い
[self presentViewController:alertController animated:YES completion:nil];
}
-(void)selectedActionWith:(int)index{
NSLog(@"選択: %d",index);
// 選択時の処理
}
iPhone画面

iPad画面(吹き出し風)

説明
基本的にアラートのときと同じで、アラートコントローラーのインスタンス(alertController)を生成し、そこにボタンを配置していきます。addAction で上のボタンから順に配置されます。
popoverPresentationController の設定をしないと、iPadでエラーが出てしまいますので、必ず入れましょう。その際、表示位置は sourceRect でも sourceView でも設定できますが、 sourceView では吹き出しの位置が微妙に思い通りの位置に出ないように思います。